This project uses spare solar panels and an ESP-01 DHT11 module to gather weather data and upload it to a google spreadsheet.
The code for the ESP-01 (ESP8266) is written within the Arduino IDE. It uses a timer system to periodically check its temperature and humidity sensors, turn on the WiFi radio, then send an HTTP request (web address with parameters) to a web app linked to a google sheet document. The WiFi is then turned off until the next timer period has elapsed.
The system uses a 5V rechargeable battery pack module with a 3.7V 1100mAh 18650 cell. The trouble with charging such a big battery is that Li-ion batteries such as the 18650 cells are generally charged at 0.5 x capacity. Or in this case, the 2200mAh cell is trying to charge at 1100mA (1.1A). These solar panels are only outputting about 5W at 14V or about 350mA. This is not enough to sustain the cell’s charging current; thus, the voltage from the converter is browning out (going below the working voltage of 5V).
Ideally, the system would have lower voltage solar panels and a smaller capacity battery.
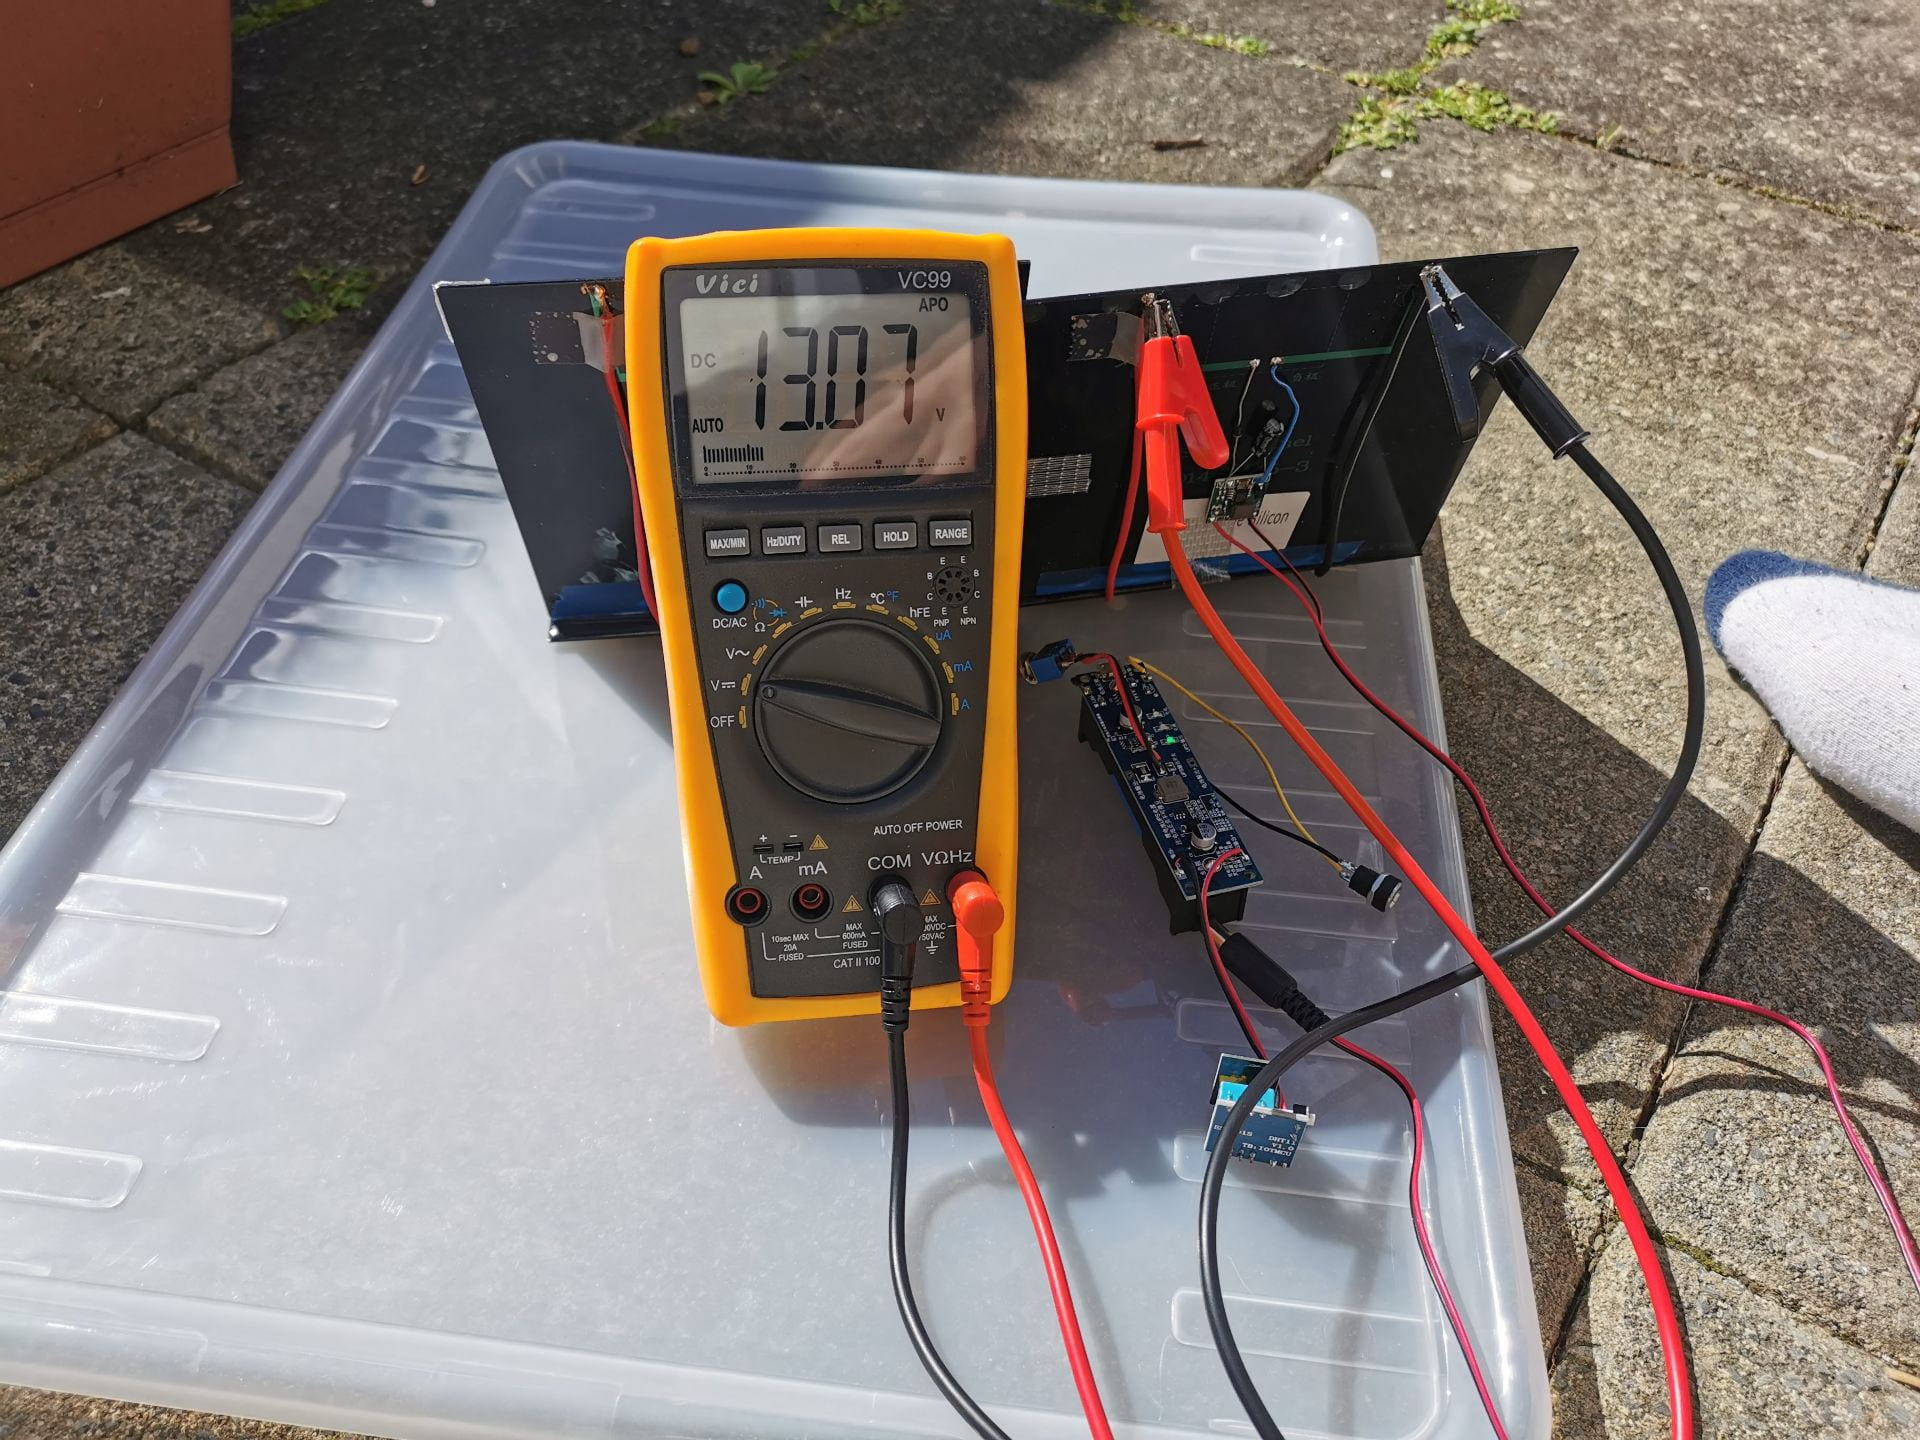
No Load solar setup

with load connected
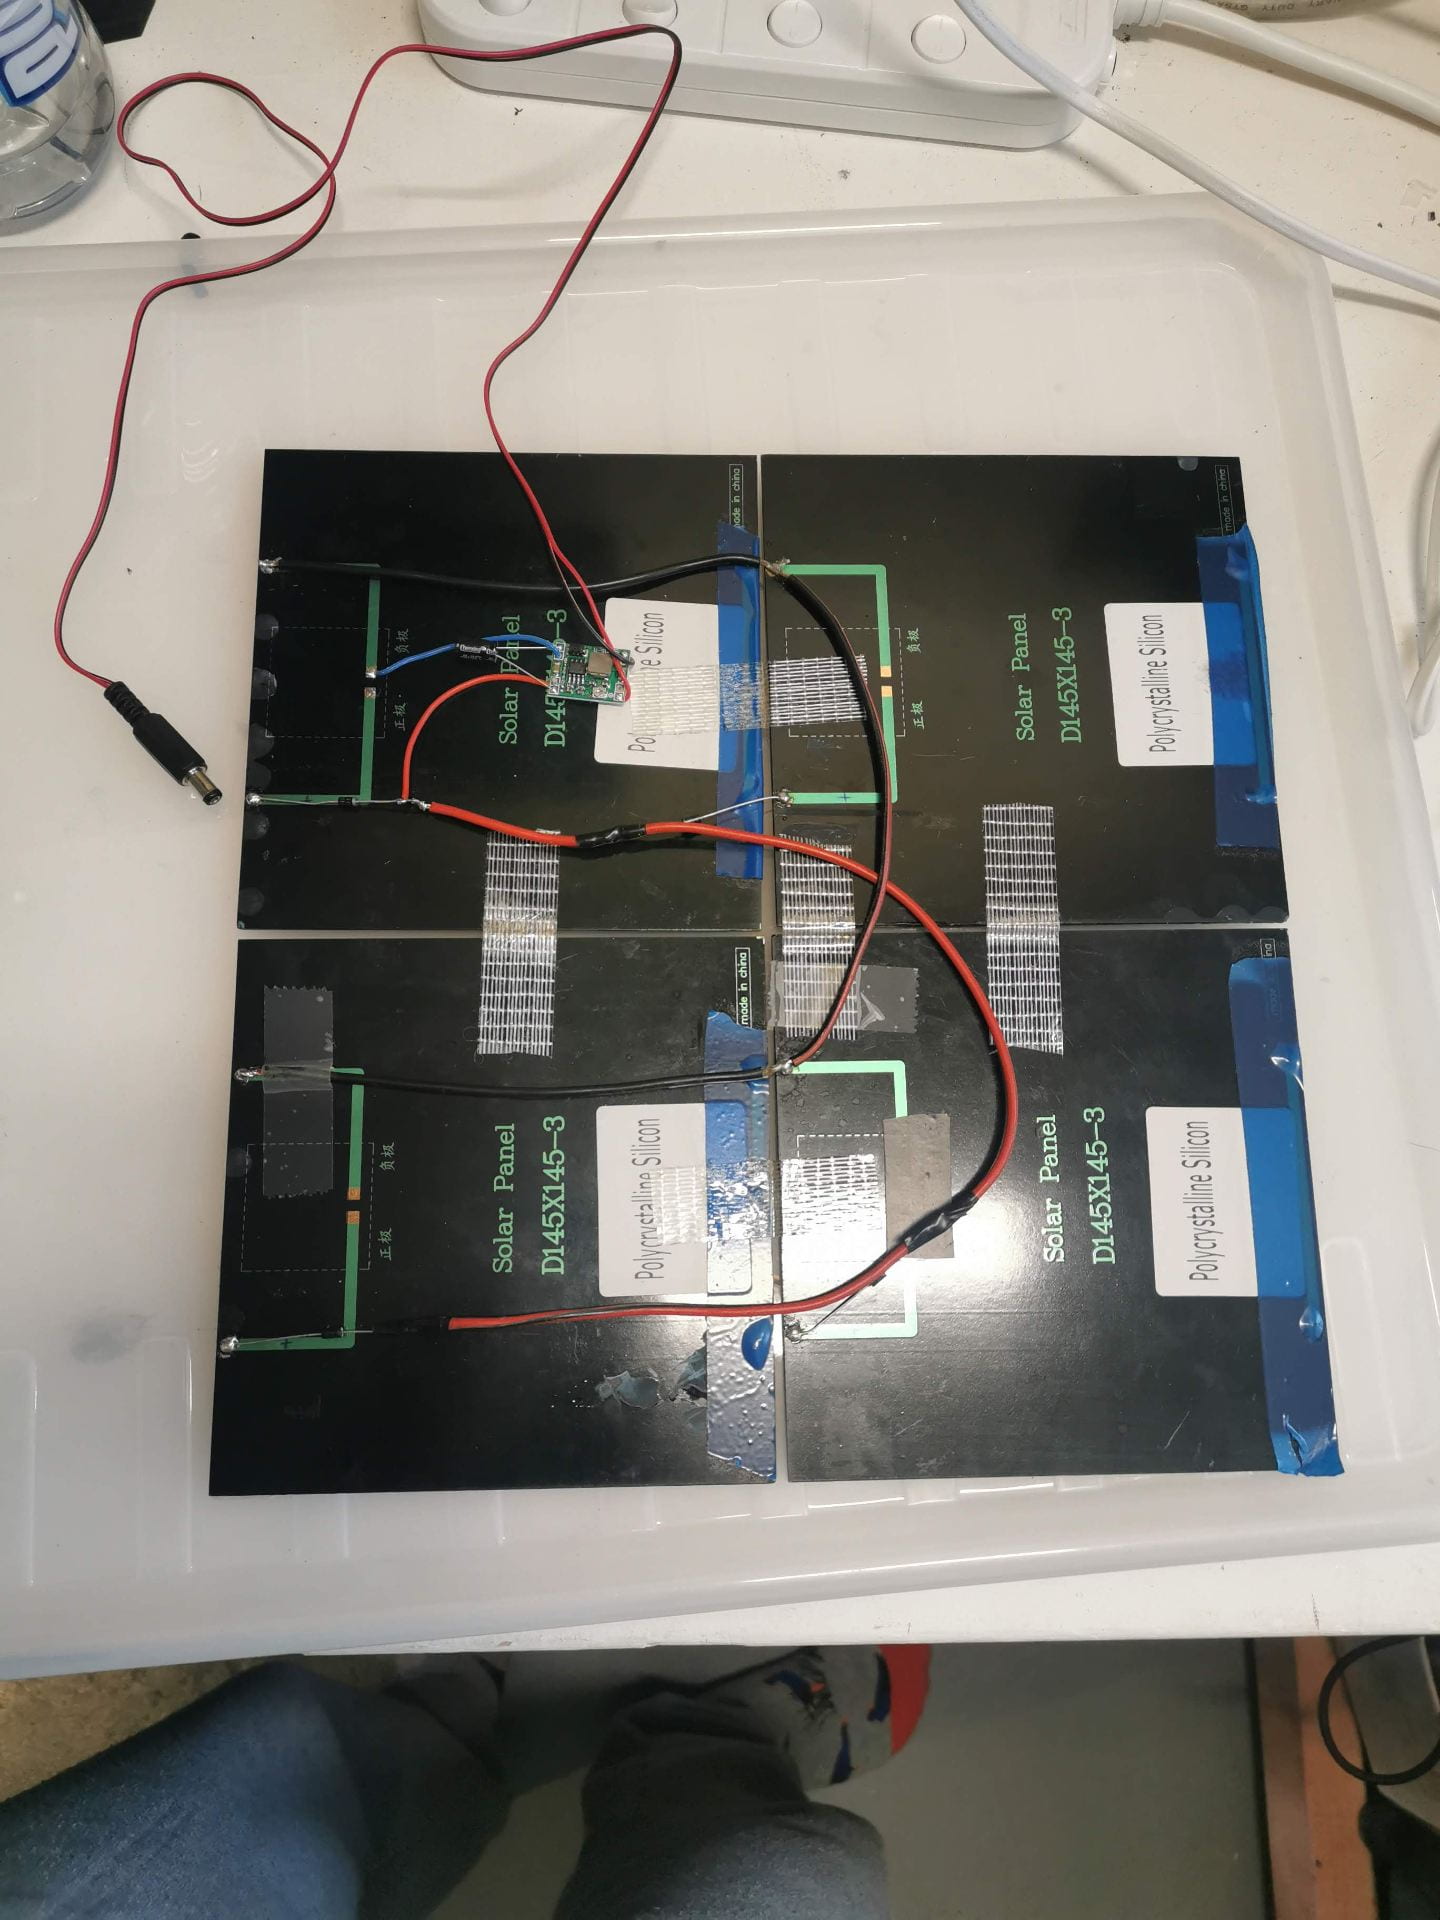
Solar Setup 1
This setup was the first attempt and had only one reverse current (blocking) diode after the 4 solar panels linked in parallel.
After some further research and testing, it was later discovered that the cells would try and even out between them. If one cell was in the shade and not producing the same power, it could become a power sink. To get around this balancing issue, the circuit was reconfigured to Setup 2.

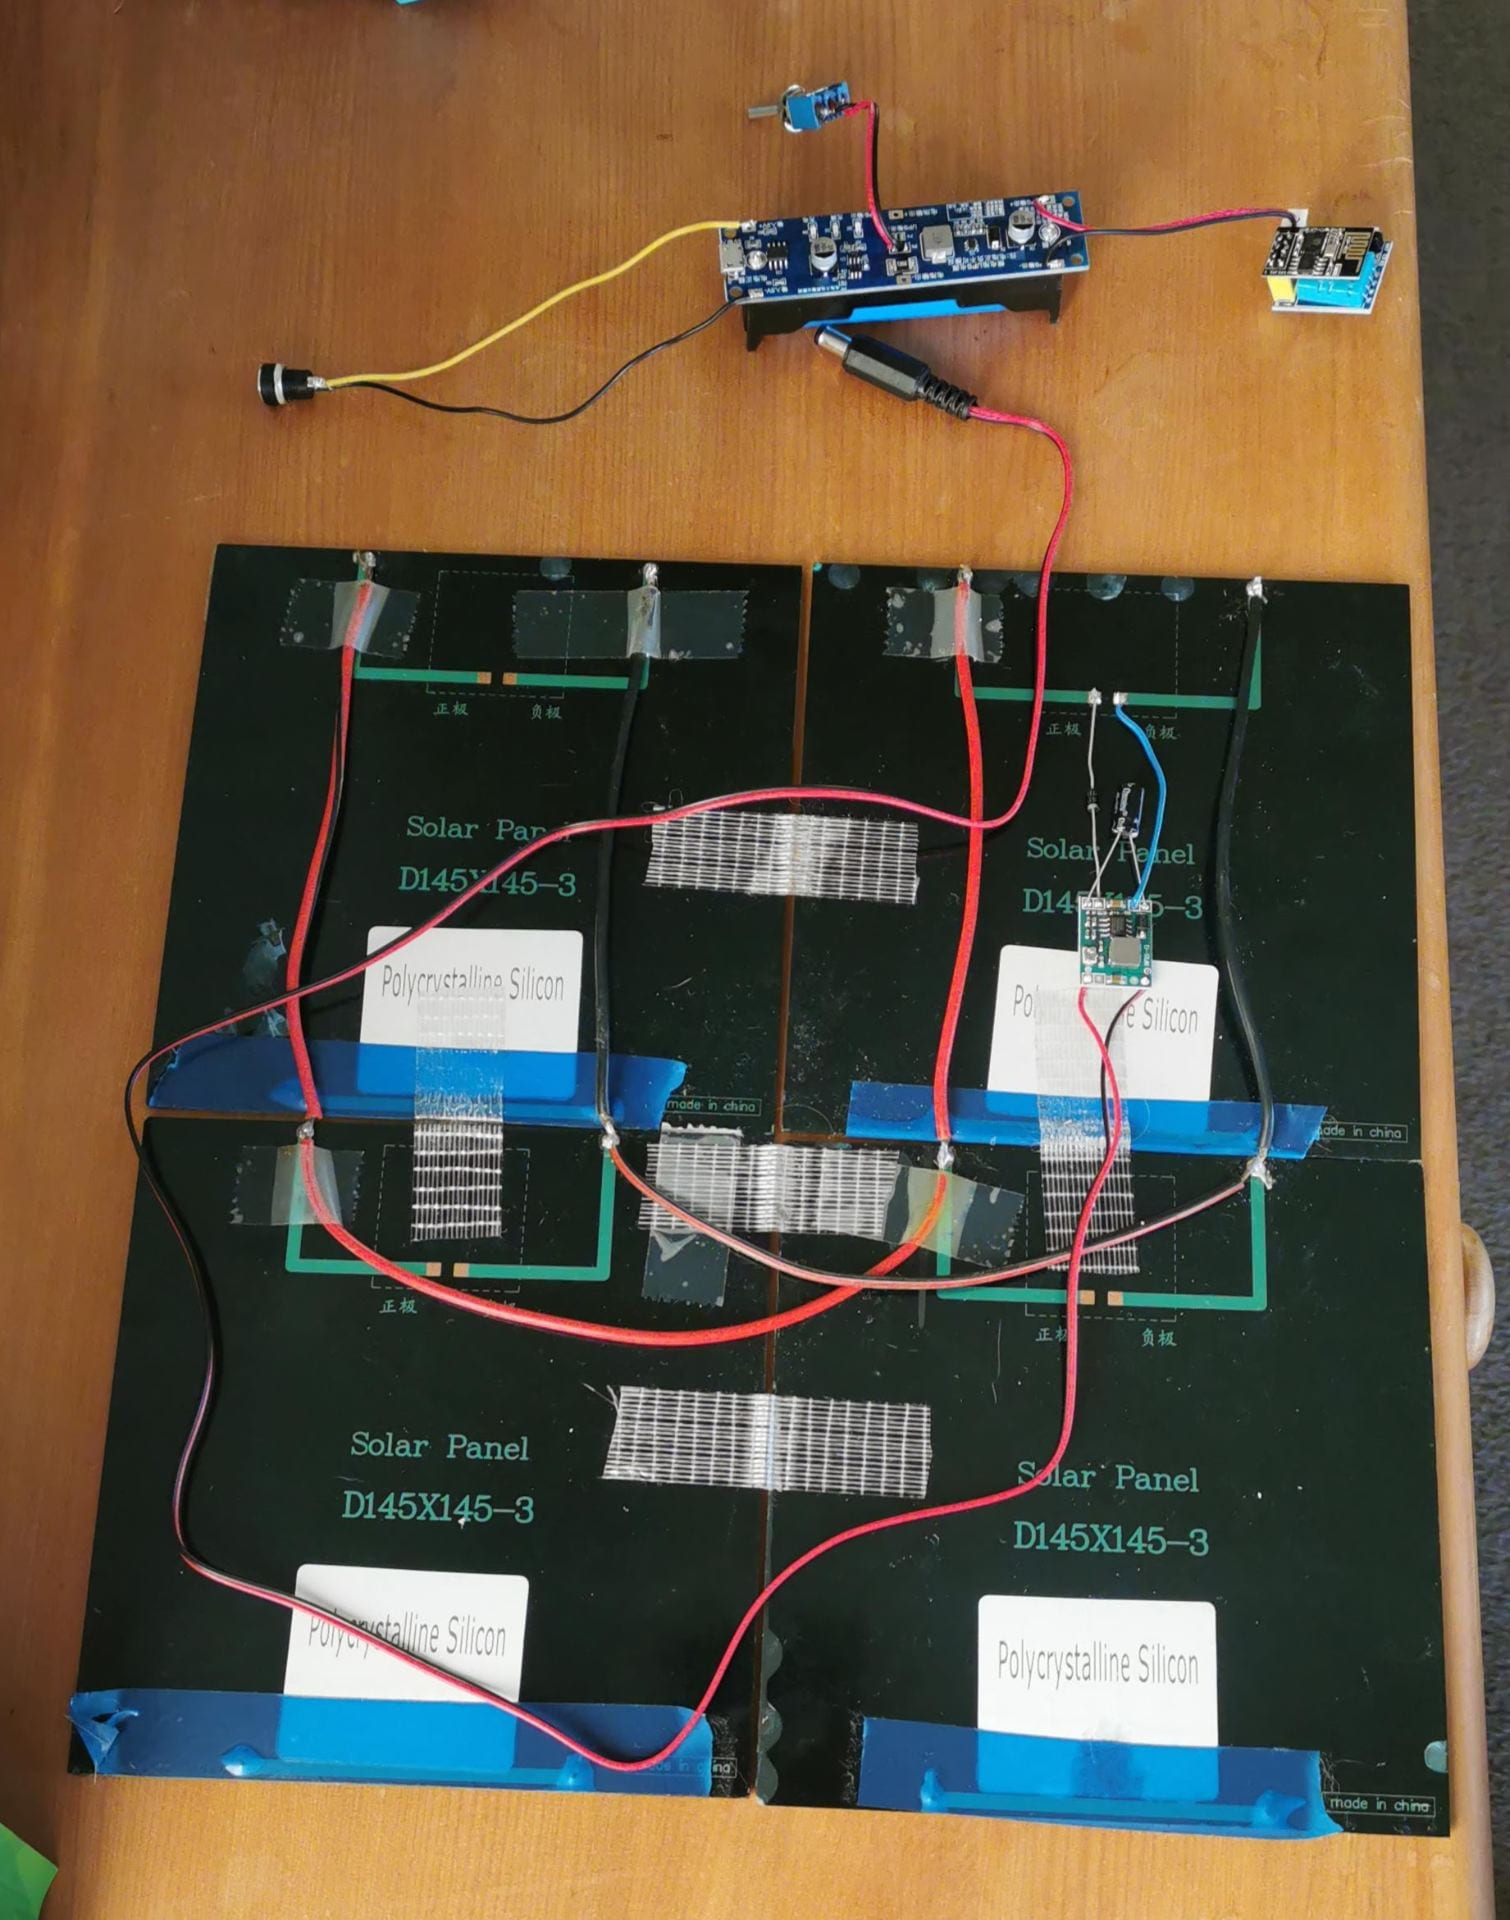
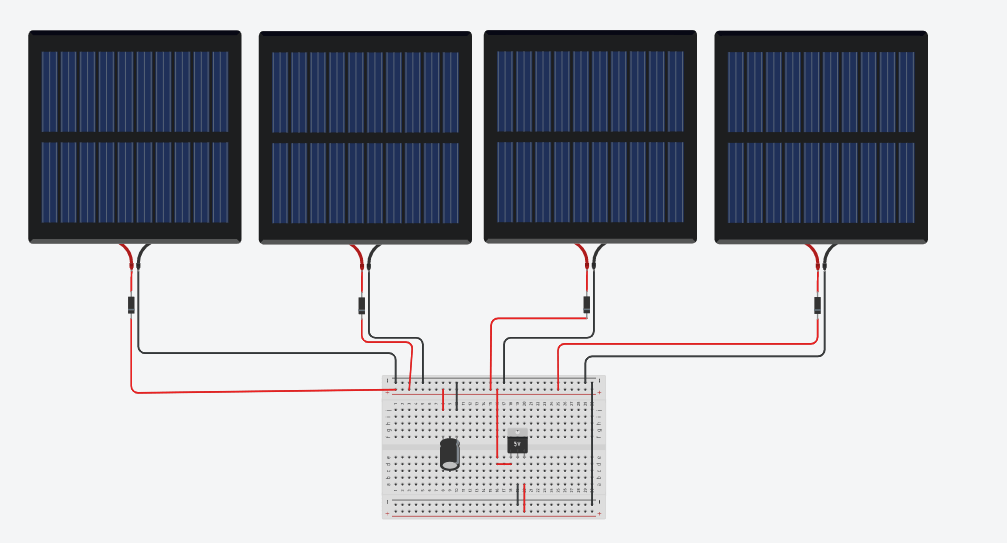
Solar Setup 2
This circuit uses 3 extra diodes, one blocking diode from each solar panel. Afterwhich the outputs are connected in parallel.
This configuration will only allow current to flow out of the solar panels and stop them from becoming a power sink if they are not producing the same amount of power.
Google Sheets script:
First of all, create a Google sheet to create the app script for. Save the sheet. The Google Sheet ID can be found in the URL address:

In the newly created sheet, click the “Tools” menu and select “<> Script Editor”. This will open in a new tab.
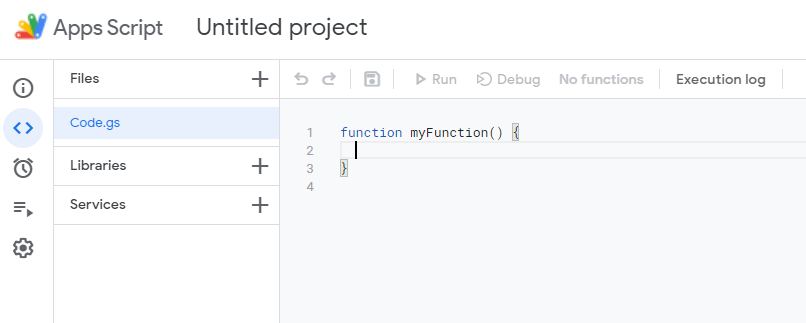
In the editor window, replace the default function with the java code in the text document below. Then click the save icon.
 Loading...
Next, click the “Deploy” button in the top right and select “New Deployment”. This will bring up the deployment control window.
Under “Select Type”, choose “Web app”, then give the app deployment a description (“My Web App”, for instance), and under “Who has access”, select “Anyone”. Then click “Deploy”. It will give you a web app URL. Copy it to test it out.
For example, this Web App deployment has a URL of :
https://script.google.com/macros/s/AKfycbwsAMt8WVTCgEQm2Xl4Uc-vJY4EbpBDgBhHhg4m7VNmPny9wNcYvMFvfZ72etbo-nk/exec
To use the Web App, we just have to add HTML variables to it. These will then get fed into the doGet function. Multiple variables can be sent at once to fill up a row. For example ‘Device1’ in column B, ‘22.54’ in column C, and ‘73.5’ in column D.
The HTML syntax for variables is after a “?” character, the variable name (column, B) followed by “=” then the value (‘Device1’). Each subsequent variable is separated by a “&” character. This will make the URL similar to the example below. Paste it into a browser to test the Web App and that the data is getting into the spreadsheet.
https://script.google.com/macros/s/AKfycbwsAMt8WVTCgEQm2Xl4Uc-vJY4EbpBDgBhHhg4m7VNmPny9wNcYvMFvfZ72etbo-nk/exec?B=Device1&C=22.54&D=73.5
ESP8266 Arduino code:
The code for the ESP-01 (ESP8266) is written in the Arduino IDE. The first step is to set up the Arduino IDE for the ESP8266 boards; see this post on how to set it up.
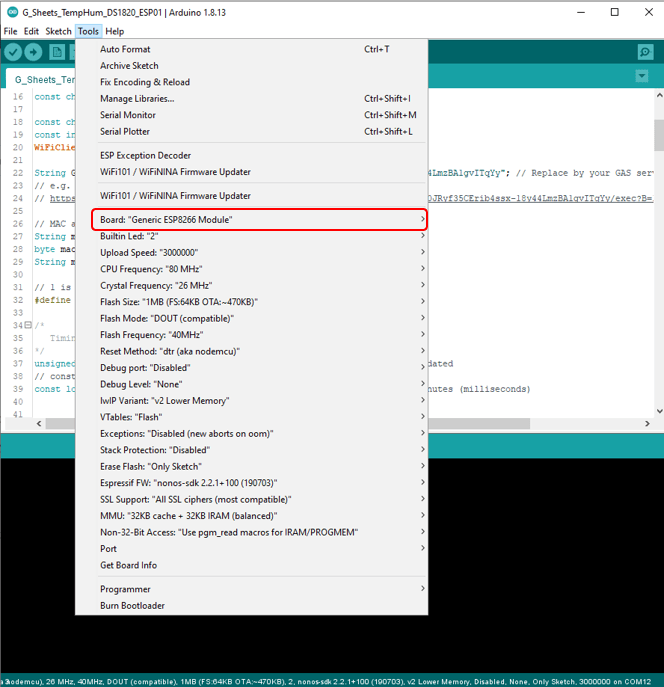
In Arduino select “Generic ESP8266 Module” as the board and copy in the code below. The basic process is to first get the devices mac address to use as its unique ID for entries. It then enters its loop which consists of turning off its WiFi Radio and doing nothing until a timer elapses, at which time it turns on the WiFi, attempts to connect while taking temperature and humidity readings. It then forms the correct URL with embedded HTML values to pass into the sheet, then sends it. The device goes back to its low power state and the loop repeats.
Loading...
Links:
Sending data to a google sheet tutorial
ESP8266 sleep modes tutorial
Reducing power consumption on ESP8266 WiFi modules tutorial
Turning the WiFi off and on tutorial