Using some specific settings and materials, we can print transparent objects with our FDM printers in the Fab Lab. These settings result in stronger and transparent prints, but take much longer and much more material than standard FDM printing. Below are some quick-start settings, further down are some deeper-dives into how and why those settings are how they are.
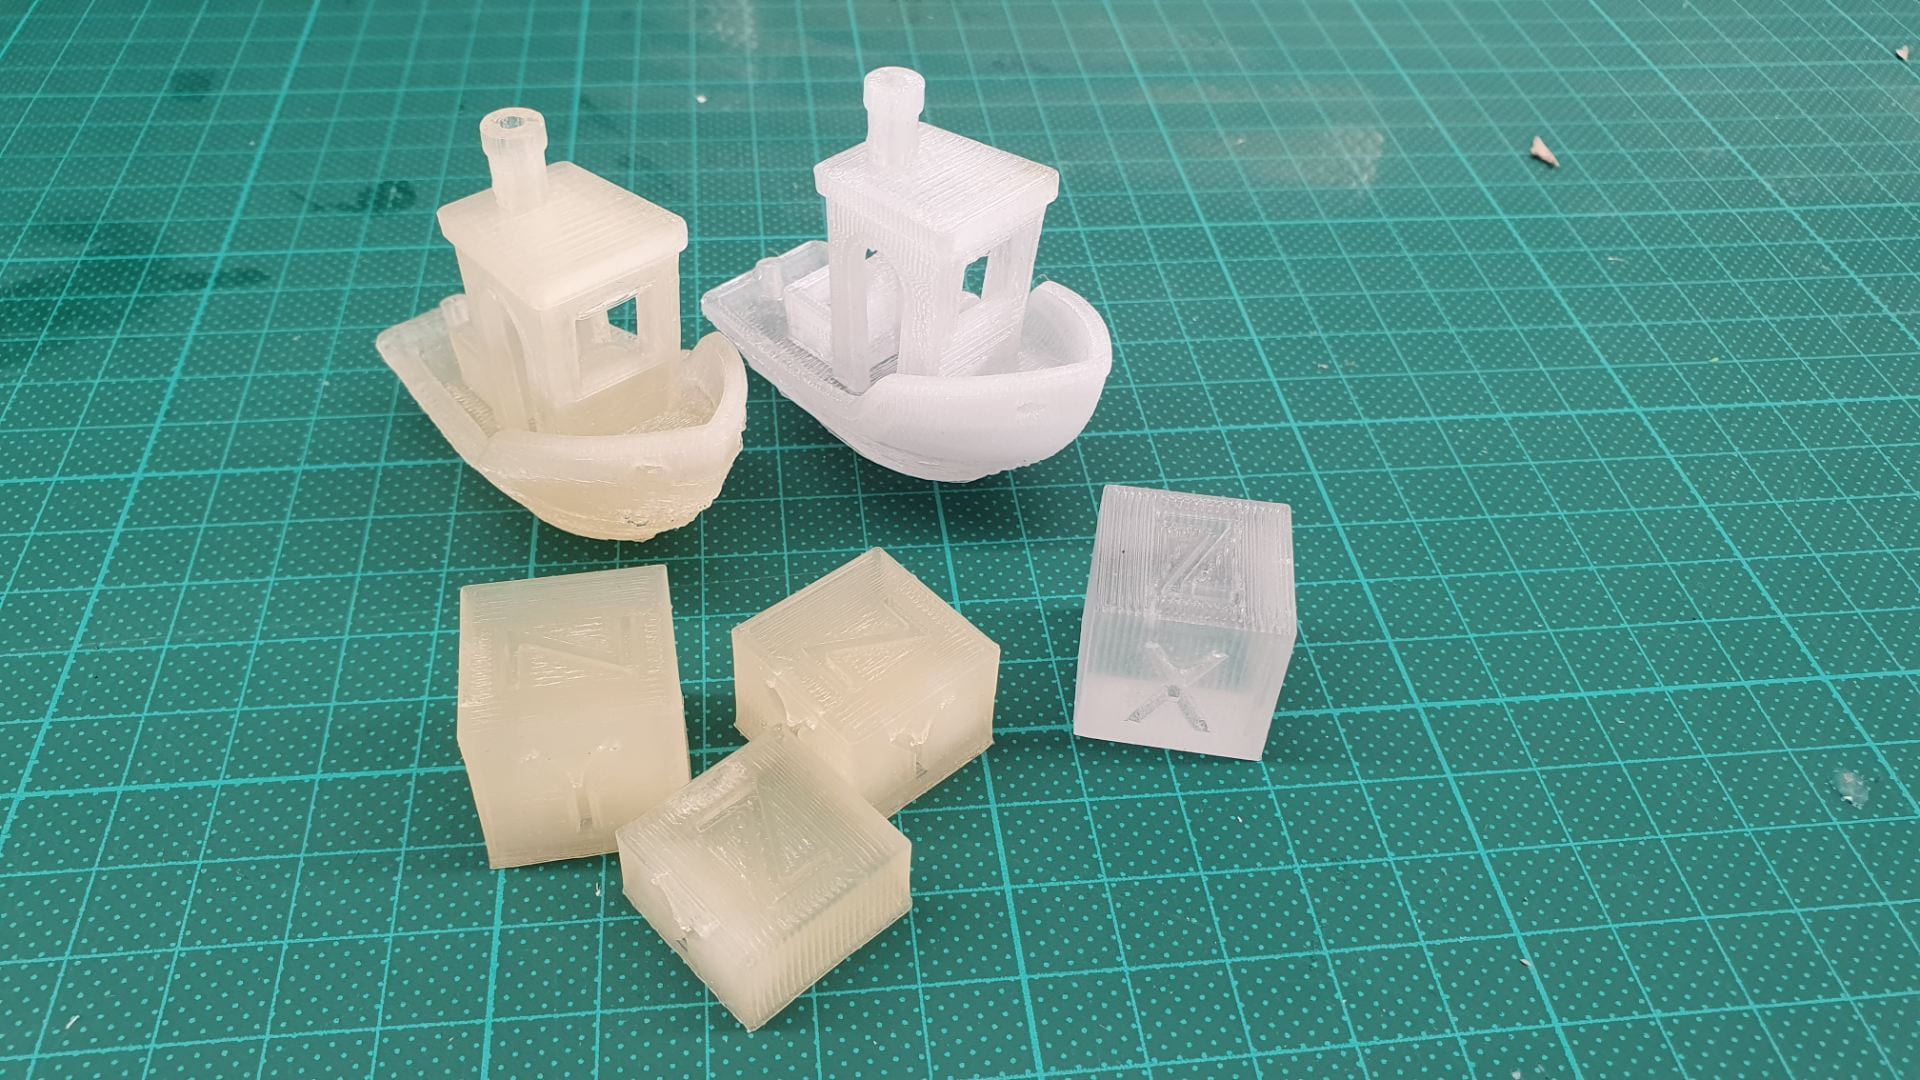
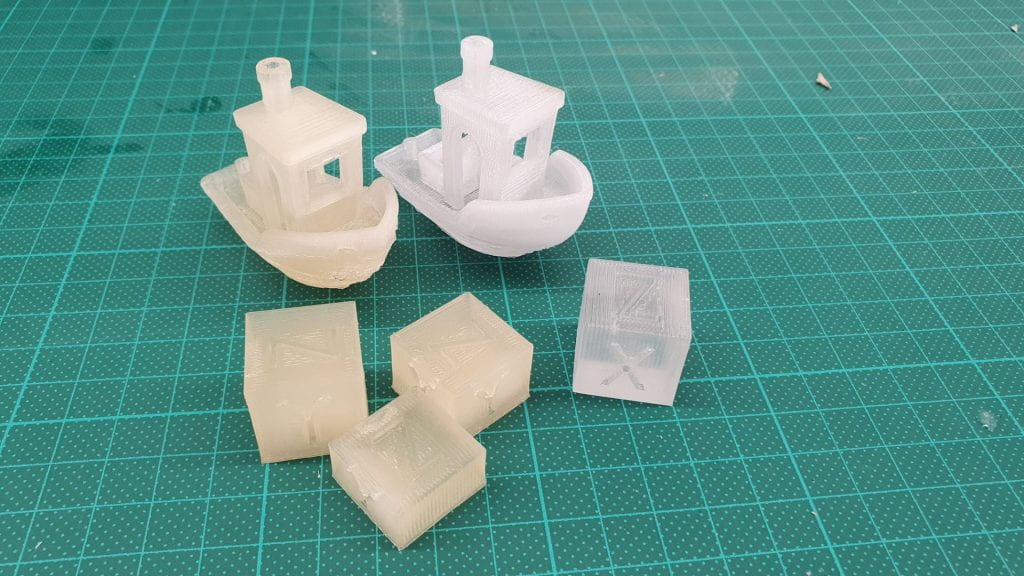
 Top down view of PLA Boat benchmark test


Quick note that the transparency in these images is more apparent in-person, each model will be on display in the Fab Lab if you want to check them out.
Quick Settings
Keep in mind that these are guides, and your print might require slightly different settings based on parameters such as its size, thickness, how complex its geometry is, etc.
These settings were used to produce the boats and cubes above.
| Layer Height | Line Width | Wall Thickness | Wall Line Count | Top Surface + Top/Bottom Line Directions | Top/Bottom Thickness | Top/Bottom layers |
|---|---|---|---|---|---|---|
| 0.15mm | 0.4mm (within 0.1mm of nozzle size) | 0.8mm (Low multiple of your line width) | 1 | [0] (zero) |
0.15mm (Same as your layer height) | 1 |
| Infill Density | Infill Pattern | Infill Overlap % | Flow (All) | Print Speed | Cooling |
|---|---|---|---|---|---|
| 95% | Lines | 5% | 105% | 15mm/s (infill and wall) | Off for clarity/maximum transparency 10% – 30% for structural integrity |
Temperature
| Print Material | Standard Print Temp |
|---|---|
| PLA | 200 – 210 °C |
| Polycarbonate | 260 – 280 °C |
For the Boat prints, I used the bolded temperatures as above.
Increasing the printing temperature may help as each deposit of filament will be more likely to melt into and fuse with its neighbours, but also runs the risk of damaging the filament or increasing the number of bubbles in the final print.
PLA vs Polycarbonate
Transparent PLA (Polylactic Acid) is a cheaper option and is usually easier to work with. Unfortunately because it is typically made from plant starch, it tends to have some inherent yellow discolouration. This means that the thicker your print is, the more opaque it will be.
Polycarbonate tends to be more durable and heat resistant, which also makes it more difficult to work with. Polycarbonate also has no colour impurities which makes it ideal for transparent printing. Unfortunately, Polycarbonate is known to absorb moisture. This means that when it is printing moisture bubbles can form in the filament if the filament is old or hasn’t been stored properly, leading to cloudy prints.
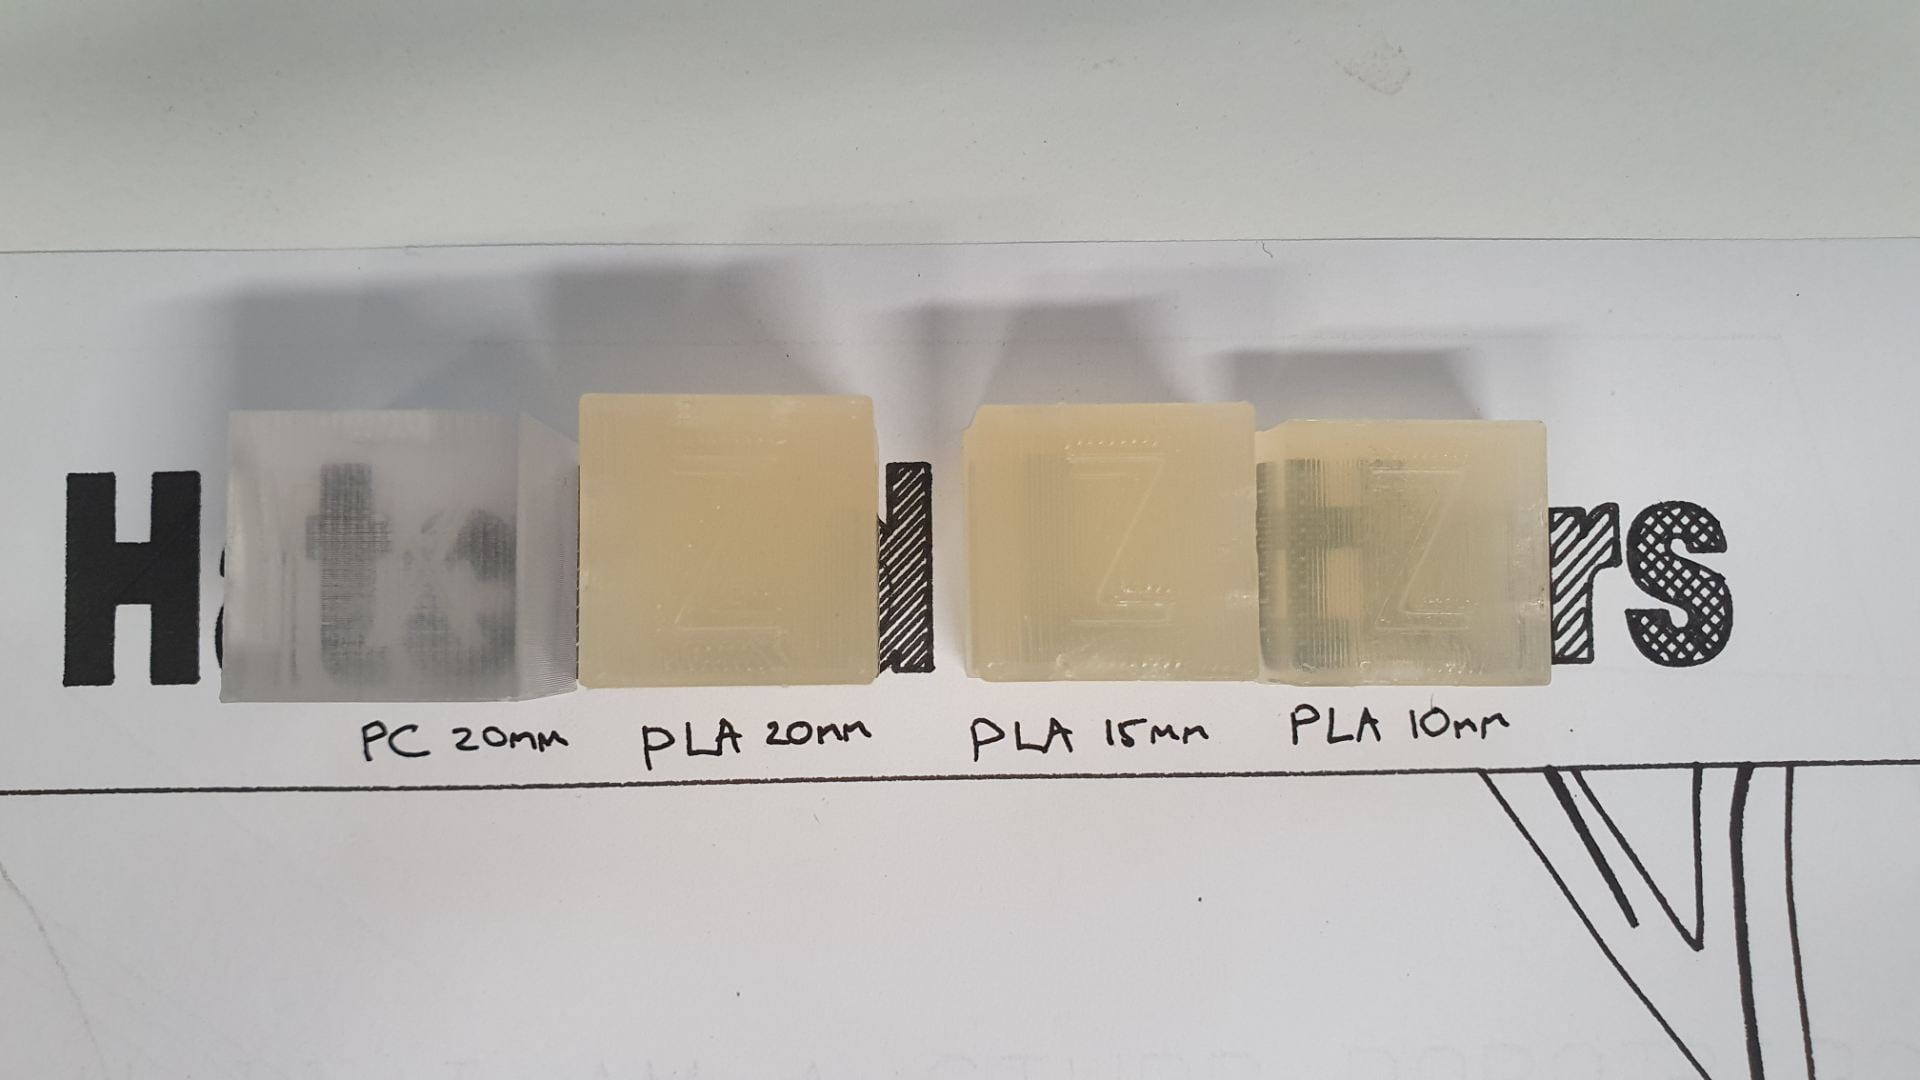
Above shows the difference in clarity between Polycarbonate (PC) and PLA in different thicknesses.
Cooling
Turn cooling off in Cura.
This will help each line of filament to melt into each other as the previous lines will take longer to cool and harden.
Unfortunately, this makes overhangs and similar geometry harder to print nicely. You may notice overhangs and arches droop as there is less structural integrity while your model is printing.
If 100% clarity isn’t your goal, you may want to add cooling at anywhere between 10 and 30%. This will make your overhangs, holes and arches more stable, but will make the print slightly more cloudy or frosted looking.
Infill + Flow Extrusion
The infill is one of the most important settings that needs to be set.
Light refracts (bends) when it passes into and out of objects and surfaces. In order to make your print as transparent as possible, we need to reduce the amount of surfaces and angles that light will pass through.
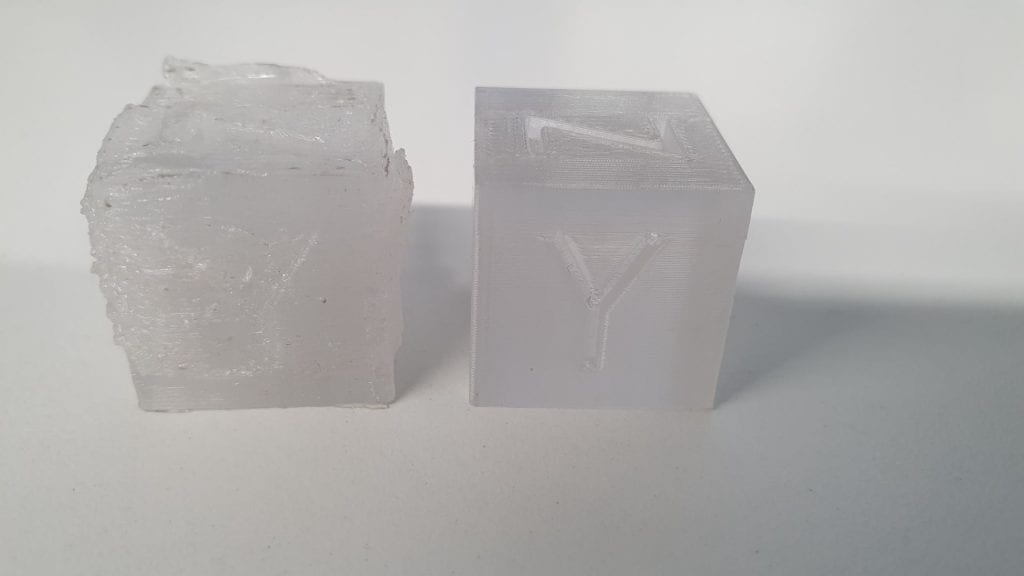
In Cura, set the infill pattern to “lines” and the direction to [0] or [90] depending on how you want to orient the print direction. This will make all of the lines face the same direction. Also set the Infill Density to ~95% and flow to 105%. this will over-extrude filament into your print which will reduce the amount of air pockets and help the melted filament to adhere directly into itself (thereby reducing the total amount of surfaces light will refract through and resulting in a clearer print).
I tried earlier with 100% infill density and 105% flow rate, but this ended with this bulging mess of a cube.
Extrusion Speed
Set your extrusion speed to ~15mm/s. Because you have turned cooling off in your print, printing quickly can cause some imperfections as the filament will take longer to cool and harden.
Walls
Under the walls tab, set the Wall Line Count to 1. Under the Top/Bottom tab set the Top/Bottom thickness to the same as your layer height. Also set the Top Layers and Bottom Layers settings to 1.
Walls, Tops and Bottoms print slightly differently to the infill. Changing the settings to these will reduce the amount of material that is printed in this way, which should result in a clearer print.