University Printers – General Use
Nearly all the university printers are on a “FollowMe” system that is linked to your university account.
Please don’t take the paper out of the printer. Ask a staff member if there is any already available or go to the book shop and purchase some.
To access your prints on the printer:
-
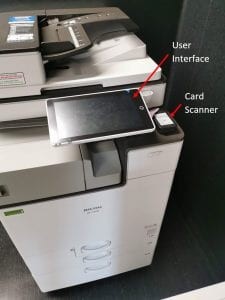
- Login manually on the user interface screen or tap your ID card on the card scanner
- Release queued print needed or delete the queued item
- Prints will only be accessible to the account it was printed from. i.e. Person A cannot print an item sent by Person B.
There are two printers to choose from before sending the print job:
-
- “FollowMe-BW on print.auckland.ac.nz” for black and white printing
- “FollowMe-Colour on print.auckland.ac.nz” for colour printing
The correct printer must be chosen before the job is sent.
If you don’t have any of these printers available, follow these instructions to install the correct driver for your device.
Note: As of 26/08/2024 printing directly from iPhones and iPads does not work

Bypass Input (Supplied Paper)
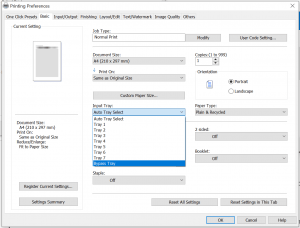
Most printers have a Bypass tray for printing on your own paper. To do this you need to select “Bypass Tray” as the Paper tray under the printer properties.
Generally, the printers can handle material from 52g/m2 to 300g/m2.
Try and choose the closest paper type you are using so the printer does not throw errors, which in some cases, can be printed out on your work. For thick paper or card, use the following as a guide:
82–105 g/m² — middle thick paper (standard copy paper)
106–169 g/m² — thick paper 1 (double thickness copy paper)
170–220 g/m ²— thick paper 2
221–256 g/m² — thick paper 3
257–300 g/m² — thick paper 4


Bypass Tray Location
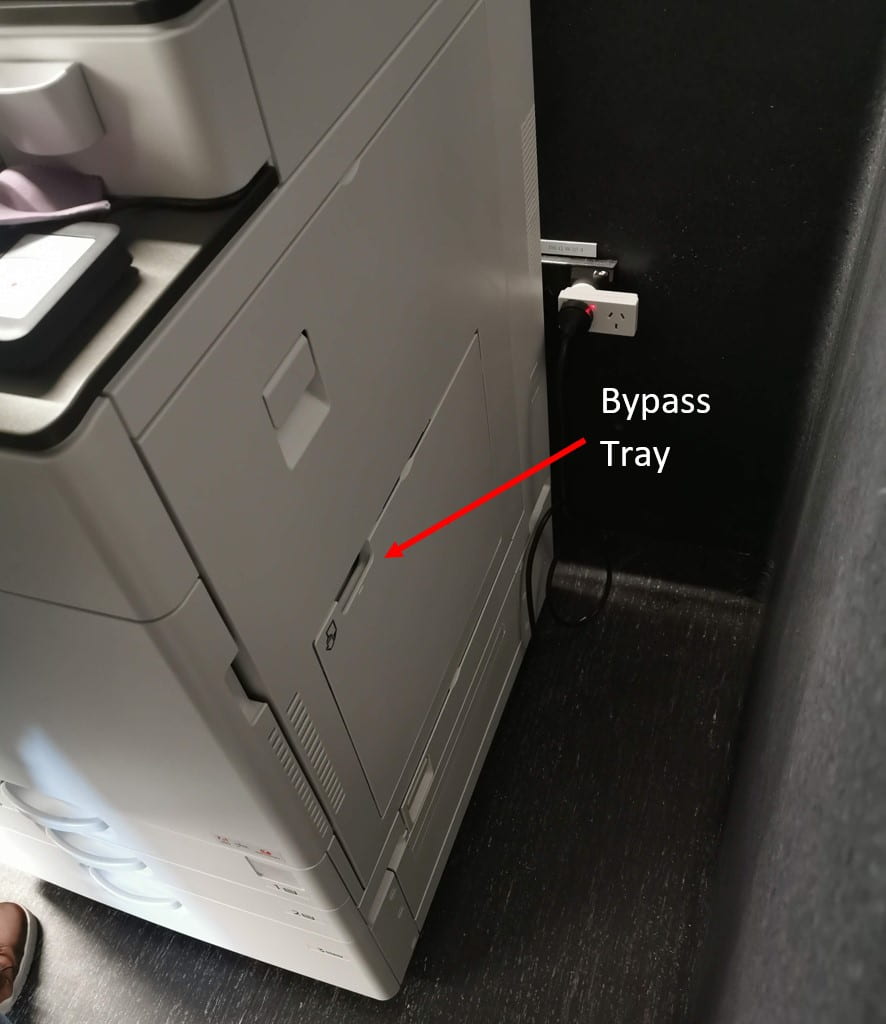
The Bypass (custom input paper) tray is located on the righthand side of the printer. Use the handhold to open the tray out.
Secure and align the paper into the tray with the ‘Paper Alignment Supports’.


Large Format Printing
The University of Auckland does not have a large format printing center. If you need anything larger than A3 printed you will need to go to a specialised print store.
We recommend: